
FlexBooking
The following instruction describes how you can set up the FlexBooking module, after we have activated this option with costs for your hostel.
1. Define the text blocks
Add a text block for FlexBooking under “Online – DormOnline – Text blocks”.
2. Set up confirmation e-mails
Choose the text blocks under “Online – DormOnline – E-mail texts” that should be part of the confirmation e-mails to the guest: “New booking (flex)” and “Booking changed (flex)”.
3. Arrange the test environment
In order to check the e-mails, tick “send DormOnline E-Mails (context menu)” in the section “Main Window” under “Hostel – Options – DormBook options”.
4. Enter a test reservation
Start Dormbook, if it is not running yet, and enter a test booking that contains several group bookings (at least two combined bookings). Ensure that the guest's e-mail address is pointing towards the person who does the test.
5. Make a test
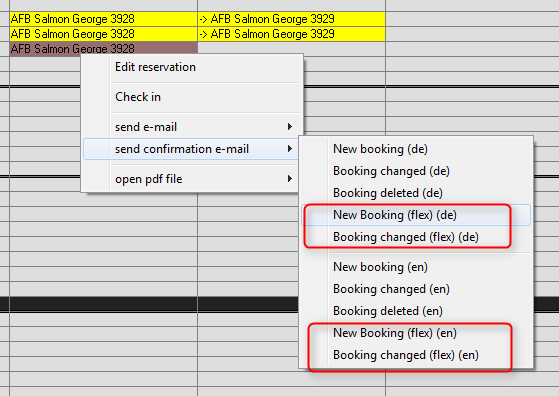
Send these test e-mails via the function “send confirmation e-mail” to your own address and check, if their content is correct. If so, proceed to the next step, otherwise adjust the e-mails and repeat the test.
6. Reset the test environment
If necessary, reset the setting “send DormOnline E-Mails (context menu)” in the section “Main Window” under “Hostel – Options – DormBook options” to the original setting.
7. Adjust the FlexBooking settings
Under “Online – DormOnline” set the value of the “FlexBooking tool” entry to -1.
8. Check the booking form
Open the link https://secure.dormproject.ch/online/{yourloginname}/?lang=en&flex=2 and enter a test booking. Check the confirmation e-mail. If necessary, adjust them and repeat the test.
9. Change the link to the booking form
As soon as FlexBooking should be available to your guests, set value of the FlexBooking entry to 2. So, your FlexBooking module is set up completely.